User Database Import
This article explains when and how to use the User Import function in VOLO.
The Basics
What is it?
The User Import feature allows an Installer or system administrator to quickly insert users into your VOLO account
without having to do so one-by-one.
When to use it?
Typical examples would be when you have an existing access control system that you are removing and replacing with a VOLO system.
In this example, you can export the user data from your legacy system and import that data directly into VOLO.
What to look out for?
There are a couple of issues that you could run into while trying to transfer users from one system to another.
Token Data Interpretation
When replacing access control systems, it is not uncommon to retain the legacy readers and access credentials.
It is possible that VOLO controllers may interpret and display access credential data differently to the legacy system. This can result in imported token data not being recognised when the credentials are presented to readers.
tip
We strongly recommend testing an import with a few users and tokens, first. Then verify that when those tokens are presented to readers connected to VOLO, they are recognised and pass back the same token number in an event as you have imported.
If they do not - please contact support, and we will be happy to help resolve the issue.
Multiple Tokens
At the time of writing this article, the VOLO User Import will only allow you to import one access token per user.
Any additional tokens will need to be added manually, after the import.
Alternatively, if you must have multiple tokens for each user, you can work around this limitation by creating additional users and assign one token to each of them.
| User ID | First Name | Last Name | Token Data |
|---|---|---|---|
| 1 | Dean | Kernot-1 | 1234567 |
| 2 | Dean | Kernot-2 | 7654321 |
| 3 | ... |
caution
If you decide to proceed with this workaround, you must manage the access rights of all users!
Import Limit
The User Import feature is limited to 2,000 records in one import.
If you have more than 2,000 users to import, you will need to split them up into multiple files of 2,000 or fewer.
How does it work?
tip
We strongly recommend that you follow this process through with a small number of users, first. Then verify that everything is working correctly before importing the full list.
Basic Process
The basic process is as follows:
- Prepare your data
- Open the VOLO website and navigate to the
User Importpage - Upload your data file
- Map the columns from your file to the appropriate option in VOLO
- Submit!
These steps will be described in detail, later in the article.
Mandatory & Optional Data
Mandatory
The User Import feature requires that your data include at least the following 4 columns:
- User's first name
- User's last name
- Interface Type
- Token Value
info
Interface type should be either "Clock and Data" or "Wiegand". If you are using Paxton readers you should select "Clock and Data" and, for most other readers, you should select "Wiegand".
Optional
The following items can also be imported:
- Access Level
- User Group
- Exempt from lock down
- PIN (Token & PIN)
- Valid from date
- Expiry date
- Small Custom Field 1
- Small Custom Field 2
- Large Custom Field 1
- Large Custom Field 2
- Extra Large Custom Field 1
caution
When importing Access Levels and User Groups, you must make sure the access level or user group has been created in VOLO, before importing the users.
Additionally, the names of access levels or user groups used in the import file must be identical to the names assigned to them in VOLO.
Data Preparation
There are a few checks you can do in advance to make the import go as smoothly as possible.
- Make sure your import file is a CSV (comma separated values) file. If you are using Excel, you can "Save As..." and select this format
- Check/cleanse the data in each column
- Make sure there is data in every mandatory field (e.g. you must have a first name and last name)
- Make sure the
Token Valueis numeric, only, with no spaces, tabs or other non-numeric characters (-,$,*,etc.) - Make sure the
Interface Typeis either "Clock and Data" or "Wiegand" - If setting access levels or user groups, make sure they have been defined in VOLO before importing
- If using the
PIN (Token and PIN)field, make sure it only contains numeric characters - If using
Valid FromorExpiresbe sure to use a date string like "31/03/2023" or "2023-03-31" - If using the
Exempt from Lock Downfield, use either "TRUE" or "FALSE"
Walkthrough
1) Prepare your data
Collect your data from the legacy system (or wherever it is coming from) and convert it into a CSV file. Work through the preparation steps in the previous section, making sure that you have all the data you need and that it is formatted correctly.
2) Navigate to the User Import page
From your home page, navigate to the Users page.
From there, select User Import on the left-hand navigation panel.

Here you will see the initial User Import view.

3) Upload your data file
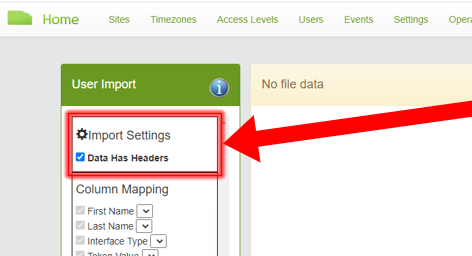
Firstly, check or uncheck the Data Has Headers checkbox on the Import Settings section of the web page.
If the data you are uploading includes a row at the top with 'labels' or column headers, make sure this is checked.
If your import file doesn't include column headers (the first row in your file is data you wish to import), then
make sure this is unchecked.
Then, drag your import file onto the web page.
You are likely to see a big red error message saying "The current data will not be imported". You can ignore this for now - this should disappear once the next section has been completed.
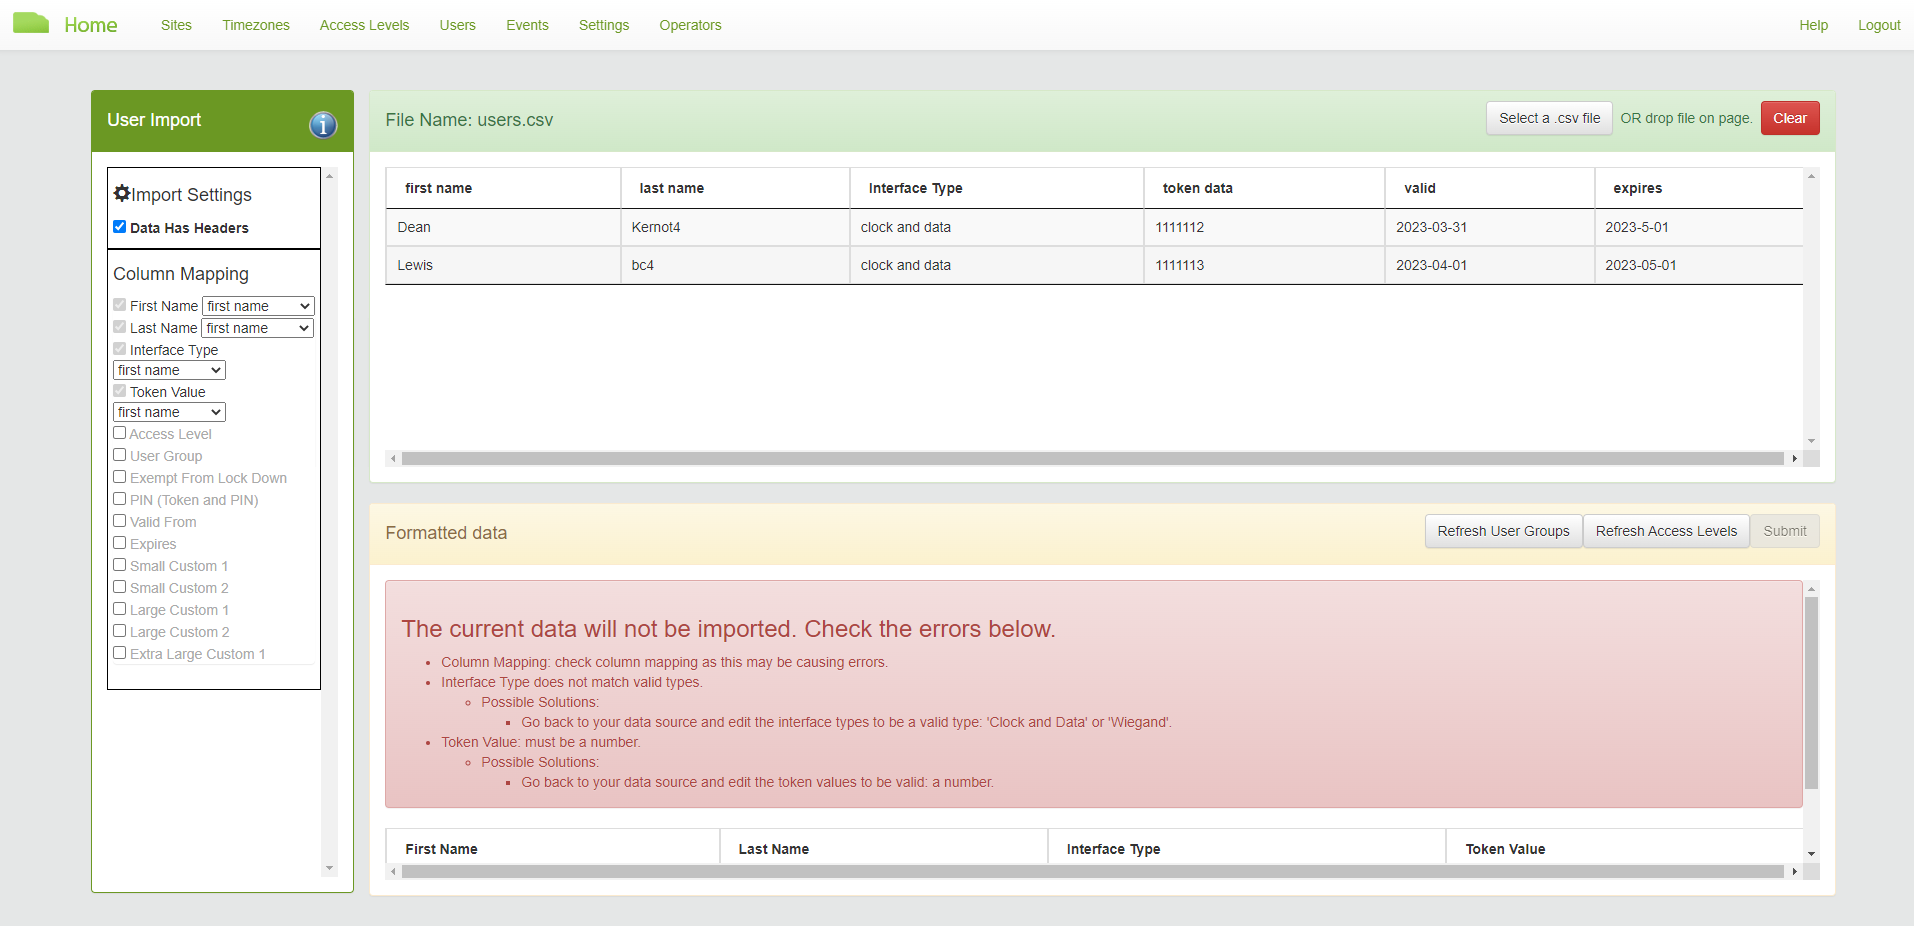
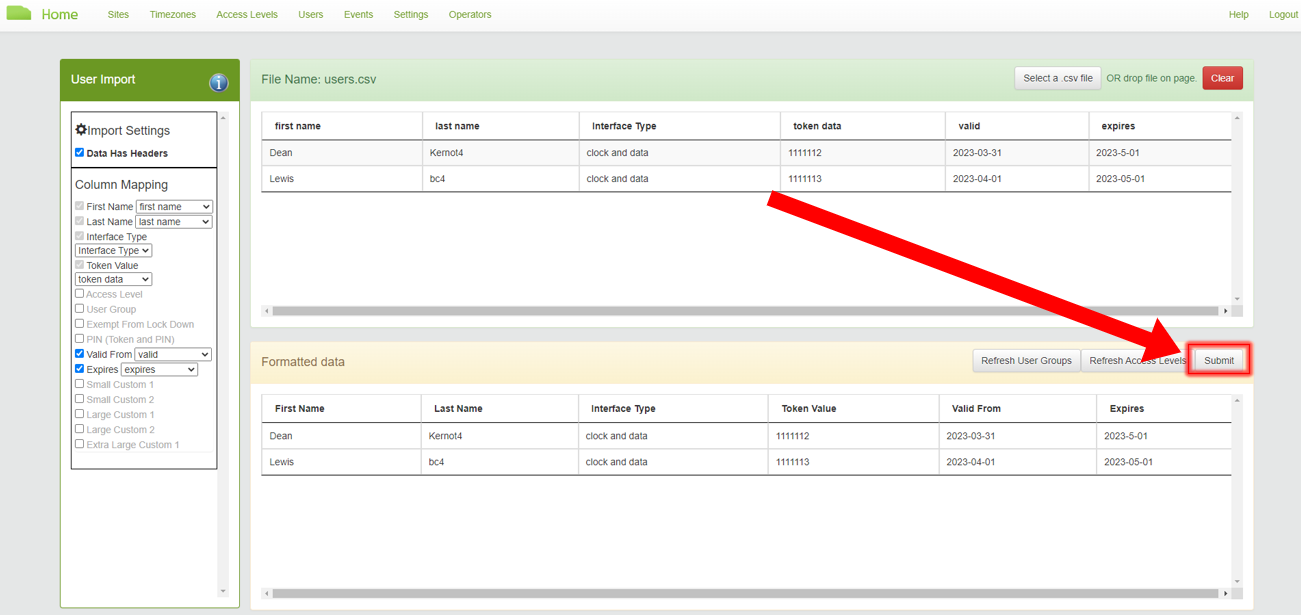
4) Map the data
If you are importing any data other than the 4 mandatory fields (first name, last name, interface type and token value),
then you will need to check the boxes alongside those fields in the Column Mapping section of the website.
tip
If your column headers match the names of the VOLO data fields, the import feature will try to match these up for you, so if you can set these column headers to match then it could save you some time.
Each field in the Column Mapping section with a checked box will have a dropdown menu alongside it which contains a
list of all of the column names in your import file (or column number if you don't have headers).
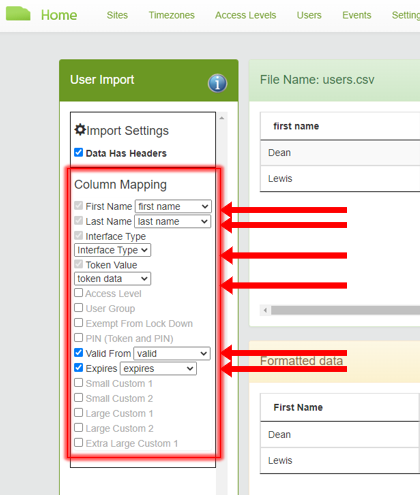
You need to go through each of the fields and select the matching column from your import file in each of the dropdown menus.
Once you have correctly aligned each of the VOLO data fields with the matching column in your import file, the red error message should have disappeared.
If the errors have disappeared, the Submit button should now be enabled for you to complete the import process!
caution
If you still have error messages being displayed, we have tried to make them as descriptive as possible and they should tell you which column issues have been found in and suggestions of how to resolve them